In the world of photography and filmmaking, having the right equipment is as crucial as possessing the skill and vision to create compelling content. While owning high-end gear might be ideal, it's not always feasible, especially for freelancers and small production companies. This is where camera equipment rental becomes a game-changer. However, navigating the rental […]
In the realm of visual storytelling, the green screen stands as a powerful tool, unlocking a world of creative possibilities. Commonly used in filmmaking and photography, green screen technology allows artists to conjure up any backdrop they envision, transforming a simple studio space into limitless worlds.
This blog post delves into the art of creating magic with a green screen studio, providing essential tips and techniques. Whether you're a seasoned professional or a budding enthusiast, understanding how to utilize a green screen effectively can elevate your projects to new heights, blending imagination with reality in the most seamless and captivating ways.
Understanding the Basics of Green Screen Technology
Understanding the basics of green screen technology is fundamental for anyone looking to delve into the world of visual effects and creative imagery. At its core, green screen technology, also known as chroma keying, is a process that involves filming a subject in front of a solid-colored background, typically green, and then digitally replacing that background with any desired scene or image in post-production. The reason green is predominantly used is due to its distinctiveness from most human skin tones and clothing colors, making it easier to separate the subject from the background during editing.
The magic of green screen lies in its ability to blend the real and the imaginary seamlessly. By using this technique, filmmakers and photographers can place their subjects in any setting without leaving the studio, whether it’s a bustling cityscape, a serene landscape, or an entirely fictional realm. This not only expands creative possibilities but also significantly reduces production costs and logistical challenges associated with on-location shoots.
However, the key to successful green screen usage lies in understanding the technical nuances. This includes selecting the right shade of green, ensuring the screen is well-maintained and free of wrinkles or shadows, and understanding the lighting and camera techniques specific to chroma keying. Mastery of these elements ensures a clean and easy editing process, allowing the background replacement to look natural and realistic. As we delve deeper into green screen techniques, it becomes evident that this technology is not just about replacing a background; it's about opening a gateway to boundless creativity.
Chroma key is a visual effects technique for layering two images or video streams together based on color hues. This technique is commonly used to remove a background from the subject of a photo or video – particularly in news broadcasting, motion picture, and videogame industries. The process involves shooting the subject against a solid color background, usually green or blue, because these colors are furthest away from human skin tones, making them easier to separate from the subject.
Here's how chroma key works in simple terms:
- Shooting: The subject is filmed or photographed against a green or blue backdrop. This backdrop must be evenly lit to avoid shadows or variations in color, as any inconsistency can make the keying process challenging.
- Editing: During the editing process, the specific color of the backdrop (green or blue) is selected and made transparent. This is achieved using software with chroma key capabilities, where you can use a color picker tool to select the background color.
- Layering: Once the background color is made transparent, the subject can be superimposed over a different background. This new background can be anything from a static image to a complex animated landscape.
The reason why green and blue are typically used for chroma keying is due to their prevalence in colors found in clothing and other objects, which makes it less likely that the subject (or parts of them) will be accidentally keyed out (made transparent). Green is more commonly used today because digital cameras are more sensitive to green, allowing for cleaner and more detailed keying.
Chroma key technology has become essential in modern filmmaking and broadcasting, allowing for creative freedom and the ability to create scenes and effects that would be impractical or impossible to achieve on location.
Setting Up Your Green Screen Studio
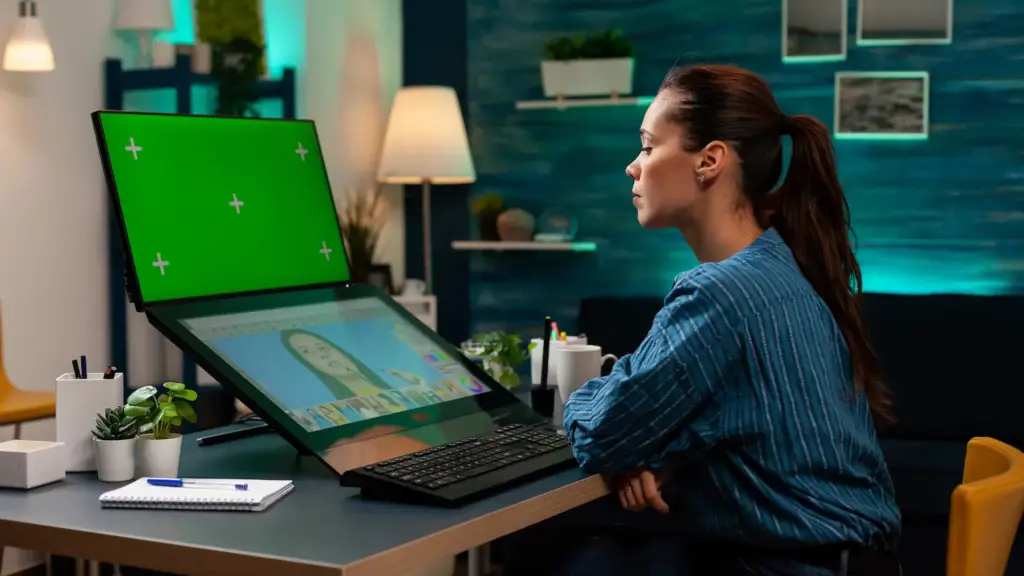
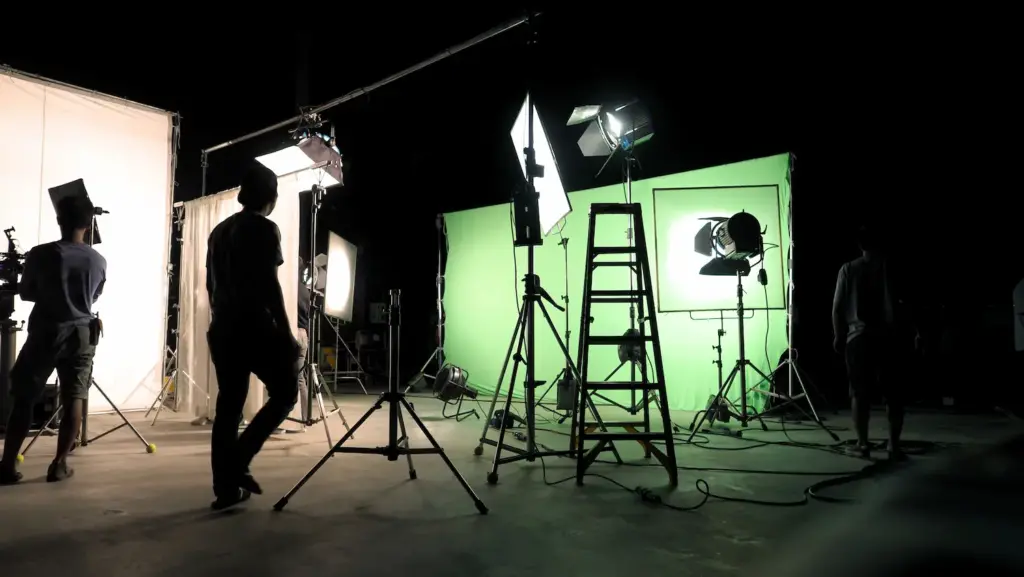
The foundation of successful green screen work lies in properly setting up your studio space. Choosing the right green screen material is the first step. You can opt for professional-grade fabric, paint, or paper, depending on your budget and the nature of your project. The key is to ensure that the surface is smooth, matte, and uniformly colored to avoid reflections and shadows.
Positioning your green screen is equally crucial. It should be stretched tightly to eliminate wrinkles and creases, which can cause issues during the keying process. Ensure there's enough space between the subject and the screen to avoid 'spill,' where the green light reflects onto the subject, making keying difficult.
Lighting the green screen evenly is another critical factor. The goal is to have consistent lighting across the screen to avoid gradients and shadows. Use soft, diffused lights to illuminate the screen, and separate lights to correctly expose the subject. This separation is vital to achieve a clean key in post-production, allowing for a more seamless integration of your subject with the chosen background. A well-set-up green screen studio is a gateway to creative excellence, providing a controlled environment where your imagination can run wild.
Lighting for Green Screen
Effective lighting is a crucial component in green screen work, often making the difference between a successful key and a post-production nightmare. The goal is to achieve even, shadow-free illumination on the green screen, while also properly lighting the subject to match the intended background environment.
Firstly, the green screen itself should be lit uniformly. This requires setting up lights specifically for the screen, separate from those used on the subject. Soft, diffused lighting works best to avoid hotspots and shadows. Using a pair of lights placed at a 45-degree angle on either side of the screen can help achieve this evenness. The intensity and distance of these lights should be adjusted until the green screen looks evenly lit on camera.
Once the screen is properly lit, the focus shifts to the subject. The subject should be lit in a way that matches the lighting of the final background. For instance, if the background is a sunny outdoor scene, the subject should have a stronger key light to simulate sunlight. It’s also important to position the subject far enough from the screen to prevent green spill, where the green light from the screen casts a hue on the subject, complicating the keying process.
Balancing these lighting setups is essential. The key is to illuminate the green screen enough to make the keying process smooth while also ensuring the subject is lit in a way that appears natural with the background. Mastering this aspect of green screen work greatly enhances the believability and professionalism of the final product.

Camera Settings and Positioning
Achieving the perfect green screen effect is not just about the screen and lighting; it's also crucially dependent on the right camera settings and positioning. The camera setup plays a pivotal role in how well the green screen will be keyed out in post-production.
Firstly, the camera should be positioned so that the green screen fills the entire background in the viewfinder or monitor, especially for a “live” key. This positioning helps avoid any non-green edges creeping into the shot, which can complicate the keying process. When this is not possible, you can create a simple garbage matte to remove the unwanted background before creating your key.
The distance between the subject and the green screen is important too; maintaining a reasonable distance helps prevent green spill and shadows. Too much green spill will crush your soul in the editing process.
In terms of camera settings, shooting in a high-resolution format with a good dynamic range is recommended to capture as much detail as possible. A narrower aperture (higher f-stop number) can help keep both the subject and the green screen in focus, especially if the subject moves. Additionally, setting the white balance manually ensures consistent color temperature, essential for accurate chroma keying.
Avoiding auto-focus is also advisable, as changes in focus can alter the appearance of the green screen across shots, making keying more challenging. By carefully considering camera placement and settings, you ensure a smoother, more efficient post-production process, laying the foundation for a successful green screen project.

Choosing and Applying Backgrounds in Post-Production
Once you've captured your green screen footage, the next step is the transformative process of selecting and integrating new backgrounds in post-production. This stage is where your creative vision truly comes to life, as you replace the green screen with the desired backdrop.
Choosing the right background is crucial and should align with the narrative and aesthetic of your project. Consider factors like the lighting, perspective, and scale of the background to ensure it matches the foreground footage. A mismatch can disrupt the illusion, making the composite look unnatural. For instance, if your subject is lit as if in sunlight, choose a background with similar lighting conditions.
In post-production software, such as Adobe After Effects or Final Cut Pro, use the chroma key tool to key out the green color. This process involves selecting the shade of green in your footage and adjusting settings like tolerance and edge feather to create a clean and seamless edge around your subject.
Layering your subject over the new background requires attention to detail. Position and scale your subject appropriately within the scene. Adding effects like shadows or reflections can enhance realism. Also, consider color grading the entire scene for consistent color tones and mood.
This stage of the process allows for immense creativity and experimentation. By skillfully choosing and applying backgrounds, you can transport your subjects to new worlds, create fantastical scenes, or simply provide a context that amplifies the message of your project.
Note: There are some great videos that show you how to remove green screen on YouTube.
Advanced Green Screen Techniques
Beyond the basics, there are advanced green screen techniques that can significantly enhance the quality and creativity of your projects. These techniques involve more sophisticated approaches and often require a deeper understanding of both filming and post-production processes.
One such advanced technique is motion tracking. This is particularly useful in scenes where the camera or subject is moving. By using tracking markers on the green screen, you can track the movement in post-production software, allowing the background to move realistically with the camera. This creates a more dynamic and immersive scene, as the background interacts naturally with the subject's movements.
Another advanced approach is integrating interactive elements into the green screen scene. For example, if your subject interacts with an object that will be added in post-production, having a physical reference in the filming stage can make these interactions more realistic. This could be as simple as a stand-in prop that is later replaced by a digital element.
Creative use of green screen also extends to using partial green screen setups or combining multiple green screen shots to create complex scenes. This allows for greater flexibility in post-production, where elements from different shots can be combined into a single, seamless scene.
Experimenting with these advanced techniques can open up new creative possibilities, allowing for more complex and visually engaging projects. However, they also require careful planning and execution, both in the filming stage and in post-production, to ensure that the final product is as realistic and engaging as possible.
Common Mistakes and How to Avoid Them
Even with the best planning and execution, certain common mistakes can occur when working with green screens. Being aware of these pitfalls and knowing how to avoid them is crucial for achieving a seamless and professional result.
One frequent mistake is not lighting the green screen evenly, resulting in shadows or hot spots. This can lead to difficulties in keying out the background uniformly. To avoid this, ensure the screen is well-lit with soft, diffused light from multiple angles. Regularly check the screen through the camera to ensure there are no dark or overly bright areas.
Another common issue is green spill, where the green color from the screen reflects onto the subject, especially around the edges. This can be mitigated by increasing the distance between the subject and the green screen and using backlighting on the subject to create a subtle separation.
Wrinkles or creases in the green screen fabric are also problematic, as they can cause inconsistencies in color and shadows. Always stretch the screen material tightly and smoothly when setting it up. If using a portable or foldable green screen, take the time to iron or steam out any creases.
Additionally, selecting the wrong shade of green during the keying process can result in parts of the subject being keyed out or the edges appearing fuzzy. Carefully sample the green color from multiple areas of the screen in your editing software to get a balanced key.
By being mindful of these common errors and taking steps to avoid them, you can ensure a more efficient and effective green screen process, leading to higher quality and more believable final footage.
Mastering the art of green screen technology is a journey filled with creative discovery and technical refinement. From setting up your studio correctly to choosing the right backgrounds in post-production, each step offers a unique opportunity to enhance your visual storytelling. The ability to control environments and create imaginative scenes that would be impossible or impractical to capture in real life opens up endless possibilities for filmmakers and photographers.
And don’t stress. The first time we tried it – over ten years ago to create our promo for our Con Man crowdfunding campaign - we made a huge mess.
Understanding the basics, paying attention to lighting and camera settings, and experimenting with advanced techniques like motion tracking and interactive elements can transform an ordinary project into something extraordinary. However, it’s also crucial to be aware of common pitfalls and learn how to avoid them to ensure a clean, professional result.
As you continue to explore and experiment with green screen technology, remember that the key to success lies in attention to detail, patience, and creativity. Whether you’re creating a fantastical world for a film or adding depth to a commercial project, the green screen is a powerful tool in your creative arsenal. Embrace the challenges and let your imagination lead the way to new realms of possibility in your visual creations.